Thursday, July 26, 2012
Something new
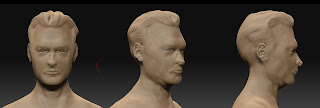
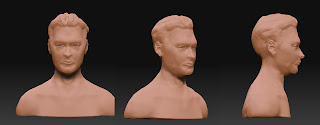
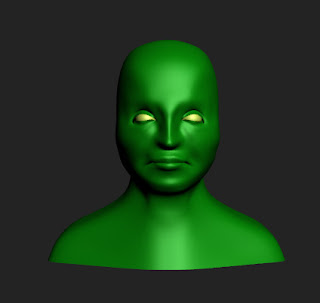
It's been a while, but since this is the first thing I have drawn in about a year and a half, I thought it was worth posting. Maybe it will be habit forming...
Monday, February 27, 2012
Defining PaneLayout borders for use with FormLayout
Hey Folks!
I am sorry for the lack of updates, I have been working lately in my free time (quite a lot, actually) but I haven't posted very much because I have mostly been working on my programming skills. Thus far, I have not been posting the programs and notes I have been writing since they are not as pretty as paintings or 3D models. However now I have decided that they I have been spending enough time working on them that I will begin posting some of the issues/solutions that I have been running into, in addition to any future paintings or 3D models. The blog is dead no longer.
And here, with the latest tidbit of information, is the solution to a problem that I ran into while Melscripting a program for work.
When you create your own custom windows with Mel, you use an assortment of layouts to position the objects (buttons, radio buttons, checkboxes etc.) in your window. One of the more useful types of layout is the "formLayout". This is a borderless "box" to contain your objects, and it lets you snap objects to specific points within it. a "paneLayout" lets you divide a window into two or more smaller windows with a moveable divider. Unfortunately I ran into a problem using the two together, until by chance I stumbled on a googlebook preview on rigging that had an example that used formLayouts embedded within paneLayouts. I promptly bought the book, and then I wrote the following example to illustrate how to do this. It turns out that all you need to do is create a separate procedure for each window that you want to use a formLayout in
I hope this saves somebody else the time, frustration, and trial and error that I went through trying to force this to work by other means.
proc panel01 (){
string $form = `formLayout -numberOfDivisions 100`;
string $button1 = `button -label "Execute"`;
string $button2 = `button -label "Exit"`;
setParent..;
formLayout -edit
-attachForm $button1 "bottom" 5
-attachForm $button1 "right" 5
-attachNone $button1 "top"
-attachPosition $button1 "left" 5 50
-attachForm $button2 "bottom" 5
-attachForm $button2 "left" 5
-attachNone $button2 "top"
-attachPosition $button2 "right" 5 50
$form ;
}
string $myWindow = `window`;
paneLayout -configuration "horizontal2";
//1st Pane
panel01;
setParent ..;
//2nd Pane
frameLayout;
button;
button;
button;
button;
setParent;
setParent..;
showWindow $myWindow;
Labels:
3D,
3D Irish Will Pittman,
Maya,
Melscript,
Programming
Saturday, April 16, 2011
Weekly Anatomy 01 - WIP


So at This point, I think I'm done the high res model, I've decimated it, and probably tomorrow I will start creating a lowpoly mesh for it. Maybe a mesh every two weeks isn't realistic given my amount of free time. We'll see how long it takes to do it properly and I'll keep doing it until I can do it super fast.

Another Model Update. Tweaked the proportions, and started honing in a bit on details. I am going to try to use the "helmet hair" as a base, and then use a few planes on top of it to give it a more realistic silhouette. I don't know how well it will work, but learning is what this is all about.

I blocked in the face a bit more, and I have started fleshing it out a bit. It's going to be a pretty cool weekend, as always I have some anatomy studies to do, but I also have some tutorials on writing shaders, the team fortress 2 characters to see their rig/topology, and I've extracted a bunch of the meshes/textures from oblivion so I can take a look at some of those. Oblivion doesn't seem like the easiest game to bring custom faces into, but I do plan on creating some props first, and then an environment, trying to adjust to the tile-based video game structure for environments. Pretty excited.
CGtalk thread
http://forums.cgsociety.org/showthread.php?p=6948079#post6948079
Saturday, April 9, 2011
Getting back into it

Hey Folks,
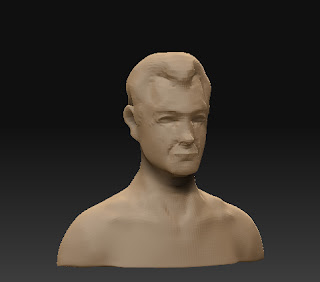
so it has been a while since I posted. I got a job offer, which long story short meant another two moves, and then I had to set myself up in my new appartment. After a month or so of playing ps3 (no girlfriend here, after all...) I started getting back into 3d tutorials and this past week I started working my way back into modeling, sketching, and anatomy studies. I'm hoping to do zbrush sketches pretty frequently, and to continue doing 3D tutorials - Lighting at the moment. This is some of what I have been working on, a WIP Zbrush sketch of a model, and then another couple quick sketches I did.
...actually my scanner does not seem to be working at the moment so the model will have to suffice.
Monday, November 29, 2010
Early work on Sofie

Hey Folks!
I jumped back into 3D today, and starting modeling my character Sofie which you may have seen in the post just before this one. I'm very happy with her lips, and the rough shape of her head so far. I have been experimenting a bit with polyflow a bit, and I'm feeling much more confident about changing the flow of the polygons. Date-day with my girlfriend tomorrow, but I can't wait to post more updates as I go!
Thursday, November 18, 2010
Concept Art - Sofie
Thursday, November 11, 2010
Lost in Space...

I'm really happy with this one! I came up with the idea when I was trying to think of stupid stuff that I did when I was a kid. I remember this one time my sister and I made a bunch of construction paper levers, switches, and screens and taped them to the bottom of the kitchen table so that it could be our space ship. I tried out a few different more serious/dramatic thumbnails, but in the end it was a lot cuter to look at it like a parent would - just outside of the 'ship'. Then I thought it would be cool to have those E.T.-like shadows coming out from under the table, making it look even more surreal and space-age. Hope you like it!
Subscribe to:
Comments (Atom)


